


Table of Contents
- Why Free Printable Preschool Tracing Worksheets Work
- Preschool Tracing Lines Worksheets: Where Every Child Starts
- Free Printable Preschool Letter Tracing Worksheets A to Z
- How to Teach Letter Tracing to Preschoolers at Home
- Preschool Fine Motor Activities That Pair With Tracing
- Choosing the Right Tracing Worksheets for Each Age (2-5)
- Printing, Reusing, and Adapting Worksheets for Every Learner
- Conclusion
- Frequently Asked Questions
Last Updated: October 18, 2026
Why Free Printable Preschool Tracing Worksheets Work
Free printable preschool tracing worksheets work because they give young children repeated, low-pressure practice with the exact hand movements handwriting demands.
At The Happy Crab Play House, our printable resources began in a real preschool classroom, and we have watched this progression with hundreds of children.
The American Academy of Pediatrics notes that fine motor control develops gradually through the preschool years, and that practice with tools like crayons and pencils supports that development HealthyChildren.org on fine motor skills.
Most guides get this wrong: they treat tracing as busywork. A well-designed tracing page trains pencil control, visual tracking, and letter recognition at once, that combination is what makes it so effective for ages 2 to 5.

Preschool Tracing Lines Worksheets: Where Every Child Starts
Preschool tracing lines worksheets come first, before letters and numbers. Letters are just lines arranged in patterns, so a child who masters straight, curved, and zigzag strokes has already learned the building blocks.
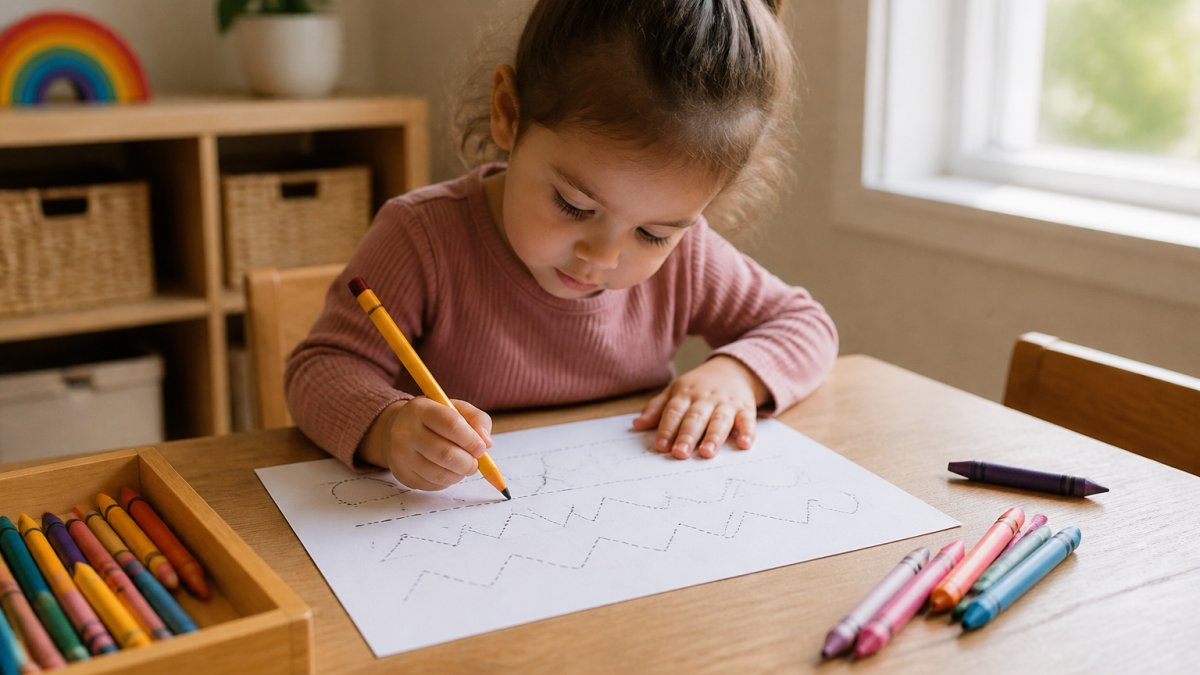
Start with the largest, simplest strokes and work down to smaller ones. A thick marker on a big page is far easier than a thin pencil on a crowded sheet.
Straight, Curved, and Zigzag Lines
Each line type trains a different motion, and the order matters:
- Straight lines build top-to-bottom and left-to-right control, the same direction used in writing
- Curved lines develop the wrist rotation needed for letters like c, o, and s
- Zigzag and jagged lines sharpen direction changes and hand-eye coordination
A common mistake is offering zigzag lines before straight ones. Children who struggle with a basic vertical line find jagged strokes genuinely hard, and the frustration sticks.
Free Printable Preschool Letter Tracing Worksheets A to Z
Free printable preschool letter tracing worksheets introduce the alphabet one letter at a time, and the best sets follow a deliberate order rather than marching A to Z. Simple-stroke letters like l, i, and t are easier than diagonal ones like k, v, and w.
Our A-Z Tracing page covers all 26 letters on a single sheet for ages 3 to 5, which suits families who want one clean reference rather than a thick workbook. For a child ready to tackle their own name, our Name Tracing page gives that practice a personal hook.

Alphabet recognition and letter formation reinforce each other: tracing a letter while saying its sound gives early literacy a double dose of practice.
Uppercase and Lowercase: Which Comes First?
Uppercase letters usually come first for a practical reason: bigger, simpler strokes that young hands can manage. Lowercase letters involve more curves and smaller movements, so they generally follow.
Do not wait until uppercase is perfect, though. Introduce lowercase once your child can trace a handful of capitals without frustration; children who only see capitals often struggle to recognize lowercase text in books, which slows reading progress.
How to Teach Letter Tracing to Preschoolers at Home
Teaching letter tracing at home takes about ten focused minutes a day, and short sessions beat long ones every time. Stopping while things are still going well is the best way to keep a child coming back.
Here is a routine that works:
- Warm up with a line page. Two minutes of straight or curved lines gets the hand ready.
- Model the letter first. Trace it yourself while saying the stroke direction out loud.
- Hand over the pencil. Let your child trace the same letter three or four times.
- Finish with something fun. A shape to color or a name to trace ends the session on a high note.
You do not need teaching training: if you can trace a letter and say "start at the top," you can run this routine.
Common Mistakes to Avoid
- Correcting grip constantly. Fix it once at the start of the session, then let it go. Constant correction kills momentum.
- Using worksheets that are too crowded. A page with 40 tiny letters is overwhelming. Fewer, larger letters win.
- Skipping the lines stage. Jumping to letters before strokes are steady sets a child up to fail.
Preschool Fine Motor Activities That Pair With Tracing
Preschool fine motor activities strengthen the same muscles tracing uses, and mixing them into the week keeps practice from feeling like a chore.
Try these alongside your tracing pages:
- Playdough squeezing and rolling builds grip strength
- Tongs or tweezers moving small objects across a table sharpen pincer control
- Shape tracing and coloring, like our Shape Tracing page, blends fine motor work with shape recognition
Number practice fits here too. Our 1-20 Slippery Slope page lets children trace numbers 1 to 20 while building the same pencil control they use for letters.

Ten minutes threading beads plus ten minutes tracing lines beats thirty minutes of tracing straight.
Choosing the Right Tracing Worksheets for Each Age (2-5)
Choosing the right worksheet comes down to matching the page to the child's current hand control, not their age on paper. Ages 2 to 5 cover a huge range of ability. The table below is a starting point, but the real guide is what you see at the table: grip, line steadiness, and how long your child stays engaged.
| Age | Best Worksheet Type | Session Length | What to Watch For |
|---|---|---|---|
| 2-3 | Large straight and curved lines, big shapes | 5 minutes | Child grips with whole fist; strokes are broad and wandering |
| 3-4 | Line tracing, shape tracing, first letters | 5-10 minutes | Starting to use three fingers; can follow a dotted line with some control |
| 4-5 | Letter tracing A to Z, name tracing, numbers 1-20 | 10 minutes | Tracing with control; ready to try freehand strokes |
The Skill Progression Behind the Ages
The ages matter less than the sequence. Tracing skills build in a predictable order, and a child who skips a step usually stalls out later:
- Scribbling with intent, the hand moves, but the child is not yet steering the mark.
- Large strokes, big vertical, horizontal, and circular lines on a full page.
- Smaller strokes and shapes, the same motions shrunk down, plus simple shapes like circles and squares.
- Letter-like forms, lines and curves arranged into recognizable letters, usually starting with simple strokes like l, i, and t.
- Letters and numbers with control, tracing and then forming letters from memory.
A two-year-old still scribbling with intent is not behind, they are on step one. A five-year-old who can trace a letter but not form one freehand is on step four; the next move is freehand practice, not more tracing of the same letter.
How to Tell When to Move Up
Watch for three signals that a child is ready for the next level:
- Steady line: the traced line stays close to the dotted path without constant correction.
- Starting at the top: the child begins strokes at the top and moves in the correct direction without being reminded.
- Comfortable grip: the child holds the pencil with three fingers rather than a fist, even if the grip is not perfect.
If you see two of the three, try a page from the next level. If the child gets frustrated within a minute, drop back down, a page that feels too easy builds the confidence that keeps a child practicing.
Printing, Reusing, and Adapting Worksheets for Every Learner
Printing and reusing worksheets stretches a single download across months of practice. Print on thicker paper if you can, since standard paper tears under an enthusiastic toddler; otherwise, a standard sheet inside a page protector works just as well.
Print Settings That Save Ink and Paper
Most home printers default to settings that waste ink. Before you hit print, check these:
- Paper size: set the printer to Letter (8.5 x 11 in) for US homes or A4 for most other regions. A mismatched setting shrinks or crops the page.
- Fit to page: choose "fit to printable area" rather than "actual size" so the margins do not cut off the tracing lines.
- Draft or economy mode: this uses less ink and is perfectly readable for tracing pages. Save the high-quality setting for pages you plan to keep.
Reusing a Page
To reuse a page:
- Slide it into a plastic sheet protector and use a dry-erase marker. Wipe clean with a tissue or a damp cloth.
- Laminate the page for daily use, then wipe it clean. Lamination holds up better than a thin protector under repeated erasing.
- Print a fresh copy when you want a permanent record of progress, such as a dated page for a portfolio.
A dry-erase marker glides more smoothly than a pencil, helping a child who presses too hard. Switch to a pencil once control improves so the practice carries over to real writing.
Adapting Worksheets for Every Learner
Adaptations matter for any child who finds tracing hard, not just those with diagnosed needs:
- Enlarge the page on a photocopier to 125% or 150% so the strokes are bigger and easier to follow.
- Tape the page down at a slight angle toward the child's writing hand so it does not slide.
- Add a colored dot at the starting point of each stroke, and a small arrow showing the direction.
A Simple Progress Checklist
You do not need a formal assessment. Once a week, note three things: whether the child started strokes at the top, whether the line stayed close to the dotted path, and whether the child wanted to keep going.
Our printable resources are designed to be printed once and used forever, which is why we build them for reuse rather than one-time completion.
Conclusion
The gap between a child who avoids writing and one who reaches for a pencil usually comes down to practice that felt manageable. Tracing worksheets build that practice into the week without a fight.
The Happy Crab Play House creates printable tracing pages designed by an early childhood educator with more than 35 years of experience, all born in a real preschool classroom.
Frequently Asked Questions
What should preschoolers trace first?
Start with preschool tracing lines worksheets before letters. Straight vertical and horizontal lines come first, then curved lines, then zigzag patterns. These pre-writing strokes build the pencil control children need for letter shapes. Once a child can follow a line with reasonable accuracy, move to shape tracing and then letter tracing. Most children are ready for simple line tracing around age 3, with letter tracing following between ages 3 and 4.
How long should a preschooler practice tracing?
Keep sessions short: 5 to 10 minutes for ages 2 to 3, and 10 to 15 minutes for ages 4 to 5. Tracing takes real concentration, and tired hands lead to frustration and poor habits. Stop while your child is still enjoying it. Two or three short sessions per week beat one long sitting. If your child loses interest mid-page, that is a signal to pause, not push through.
Should preschoolers trace uppercase or lowercase letters first?
Most educators introduce uppercase letters first because their straight lines and simple curves are easier for small hands. Once uppercase feels comfortable, introduce lowercase letters, which involve more curves and reversals. Many free printable preschool letter tracing worksheets include both cases on the same page, so your child sees the pairing early. Focus on the letters in your child's name first, since that name tracing practice feels personal and motivating.
What can I use instead of a pencil for tracing practice?
Try chunky crayons, washable markers, or short colored pencils, which are easier for small hands to grip. For reusable practice, slip a worksheet into a plastic sleeve and use a dry-erase marker. You can also trace with a finger first, or place small objects like buttons along the lines. These preschool fine motor activities build the same skills while keeping practice playful and low-pressure.


